Haul-out 2025 - Blisters, Paint and Stuff
As near as we can determine it has been about 8 years since our boat has had new bottom paint. The amount of growth supports that estimate. So before we set off south this fall, we knew this was a long overdue project that must be done.
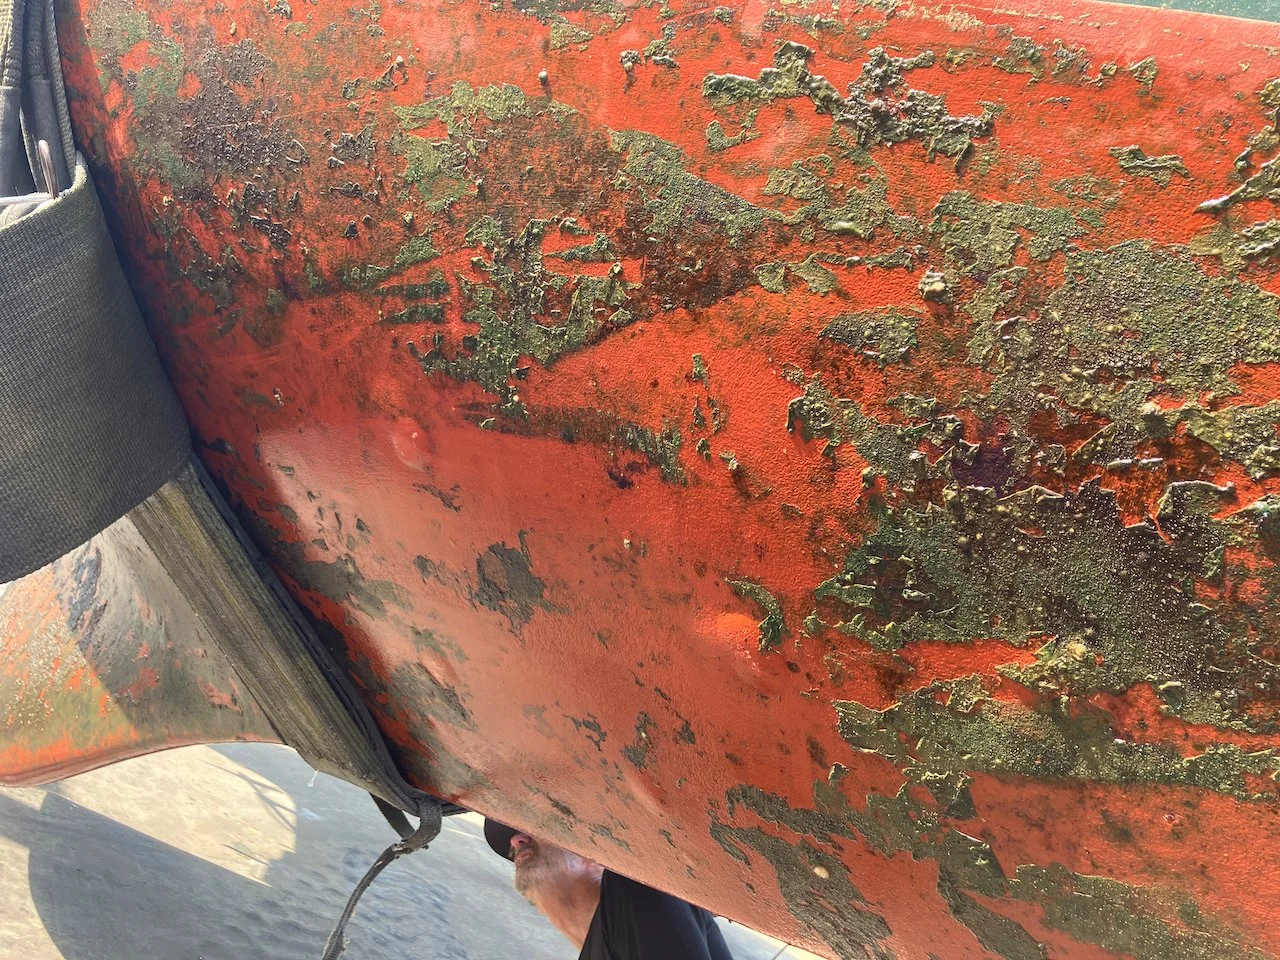
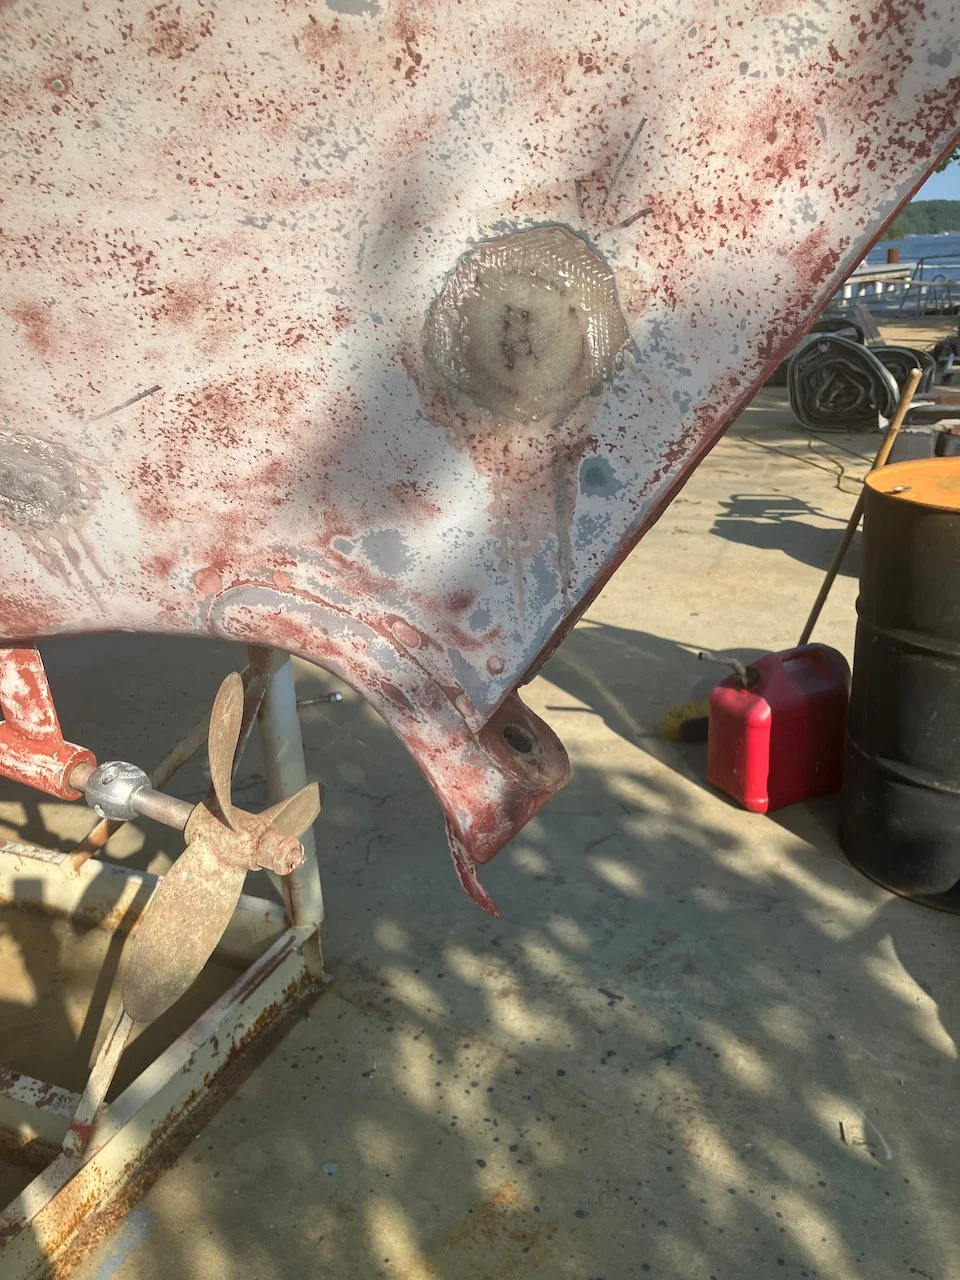
The first day out of the water allowed a close inspection of through-hulls, rudder and rigging hardware, and paint condition. We had already bought new paint; the question was, how much of the old paint has to come off. Enter the blisters. Yes Kotona has blisters. Some probably new. Some probably pretty old. Add to that, the discovery that some previously repaired blisters had now opened back up, revealing that they were repaired, at some point, in a way that I can’t quite wrap my head around.

A little over a year ago we had a diver clean the hull. When he was done, he handed me a quarter sized roundish disk of something with bottom paint on one side. Whatever was on the other side was stiff but didn’t break the way a thin piece of thickened epoxy breaks. Now with the hull out of the water, I could take a closer look at whatever it was someone had used for blister repair. There were several, at least a couple of dozen, some three to four inches across, and some of them could be easily pried away with a knife blade. Others were more secure but exhibited a noticeable gap. Examining the ones that had already pooped off or were easily pried off, it looked like very little prep work had been done prior to the repair. I couldn’t see where any grinding down to good laminate and then feathering the edges for better adhesion had been done. Which helps explain why some of them were so easy to remove.
The yard owner looked at them and commented that the laminate underneath the blister they were repairing was probably still wet when they applied whatever it is. It’s not thickened epoxy. Some are soft enough to cut with a knife. It looks like some sort of caulk. Do people repair blisters with something like 3M 4200? I don’t know, but after talking with the yard owner, we decided it was probably best to remove any that were at all loose, grind back to good laminate where needed, let them dry a while, then fill with thickened epoxy and/or a layer(s) of fiberglass cloth and paint. So the sanding and grinding began.
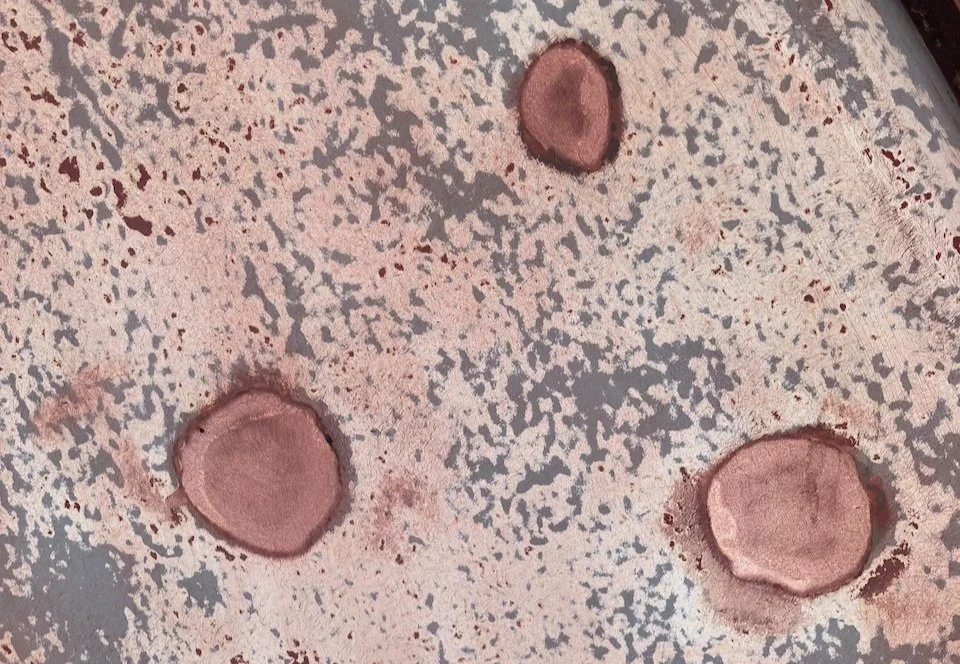
We decided to take the paint down to or at least near the original gelcoat, partly because the existing paint was pretty thick, partly because it would be easier to find all the previous repairs and decide which ones needed to be redone, and partly to give me a cleaner surface for the newer blisters we decided to open up and repair.
We decided that not all of the blisters would be addressed at this haul out because the only sure way to repair them so that they never come back, is to open up every single one, grind out any areas that have delaminated, and then, and here’s the problem, let the hull dry out. In the Arizona desert that might take days or a few weeks. In humid North Alabama / Mississippi, it might take months. We don’t have that kind of time.
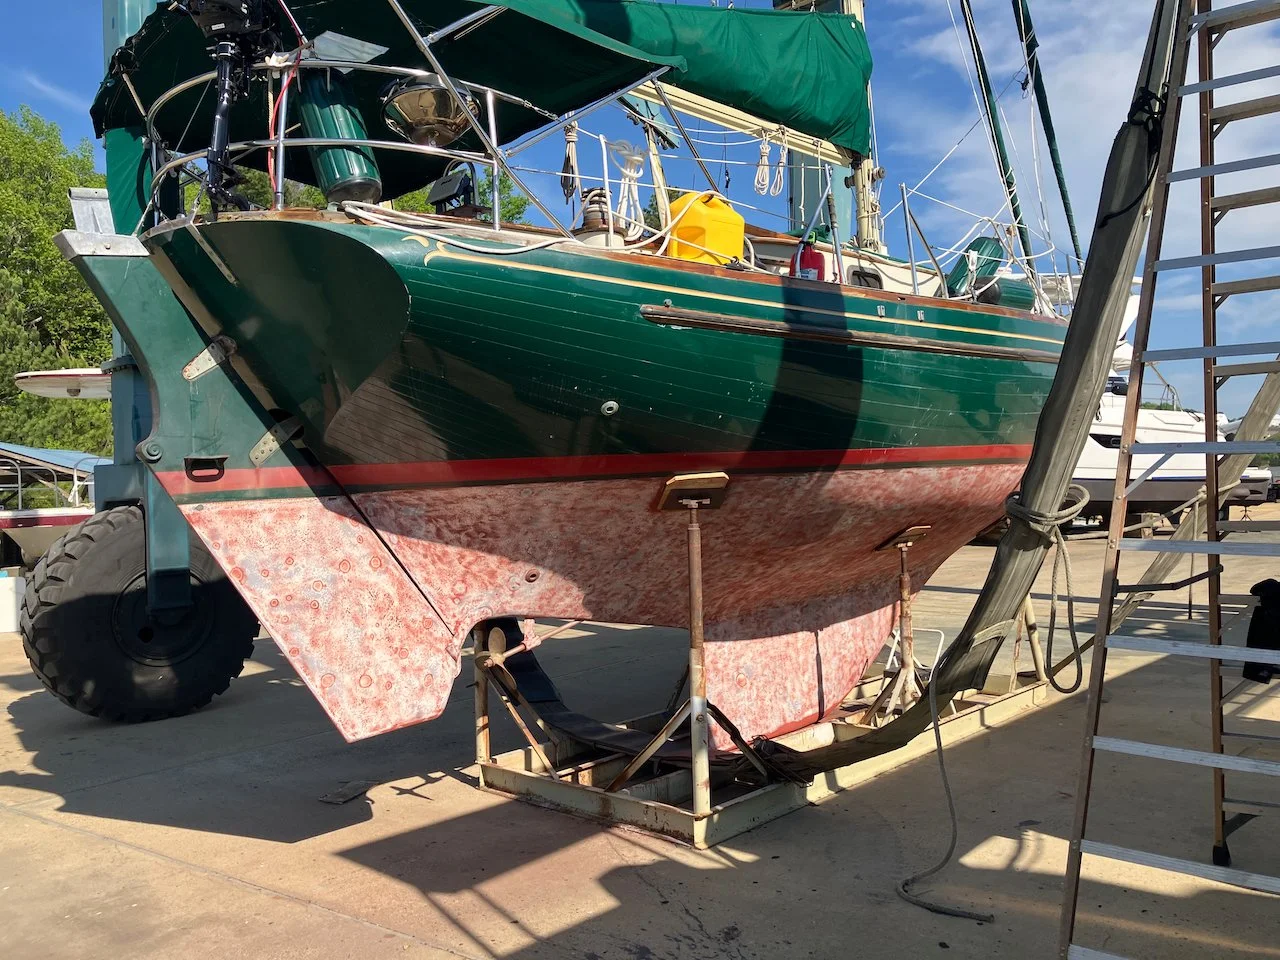
First pass of sanding, there would be one more.
Sanding on the hull to remove the old paint went pretty smooth, pun intended. Each side took a big chunk of a day, but not much more. And when I remembered to bring my little step stool the second day, even working on the keel was not too bad. The morning of the third day, sanding was complete and once the hull was wiped down completely to remove sanding residue, blister repair could begin.
Grinding fiberglass is a messy undertaking. Lung and eye protection is vital. Skin protection is recommended, depending on one’s tolerance for being itchy. Driving back to the house for 2 hours covered in dust is not my idea of a good time, so I opted for a Tyvek suit and gloves, in addition to a respirator and goggles. The blisters that needed repair were not huge but most were bad enough that some the original fiberglass has started to delaminate. When you find that, you have to grind out that bad glass in order to have a strong substrate for the new glass and epoxy to grab.

Somewhere around thirty spots were ground out and after about a week of drying out, I added new fiberglass cloth layers, as many as three on the worst spots. With temperatures in the low 80s, the epoxy didn’t give me a long working window, so many small batches of epoxy were mixed. And eventually they were all filled. The following day, or later depending on weather, the areas I’d filled in would be sanded and smoothed, and ready for paint.
With the blister repairs complete, I turned my attention to the rudder. Fortunately the rudder had no blisters that needed to be ground out. So it was just a matter of sanding the old paint off. The sides were completed with the rest of the hull. The leading edge, however, was practically inaccessible. On the E31 Independence, the below the waterline portion of the transom mounted rudder fits into a recess in the hull. On ours that fit is pretty snug.

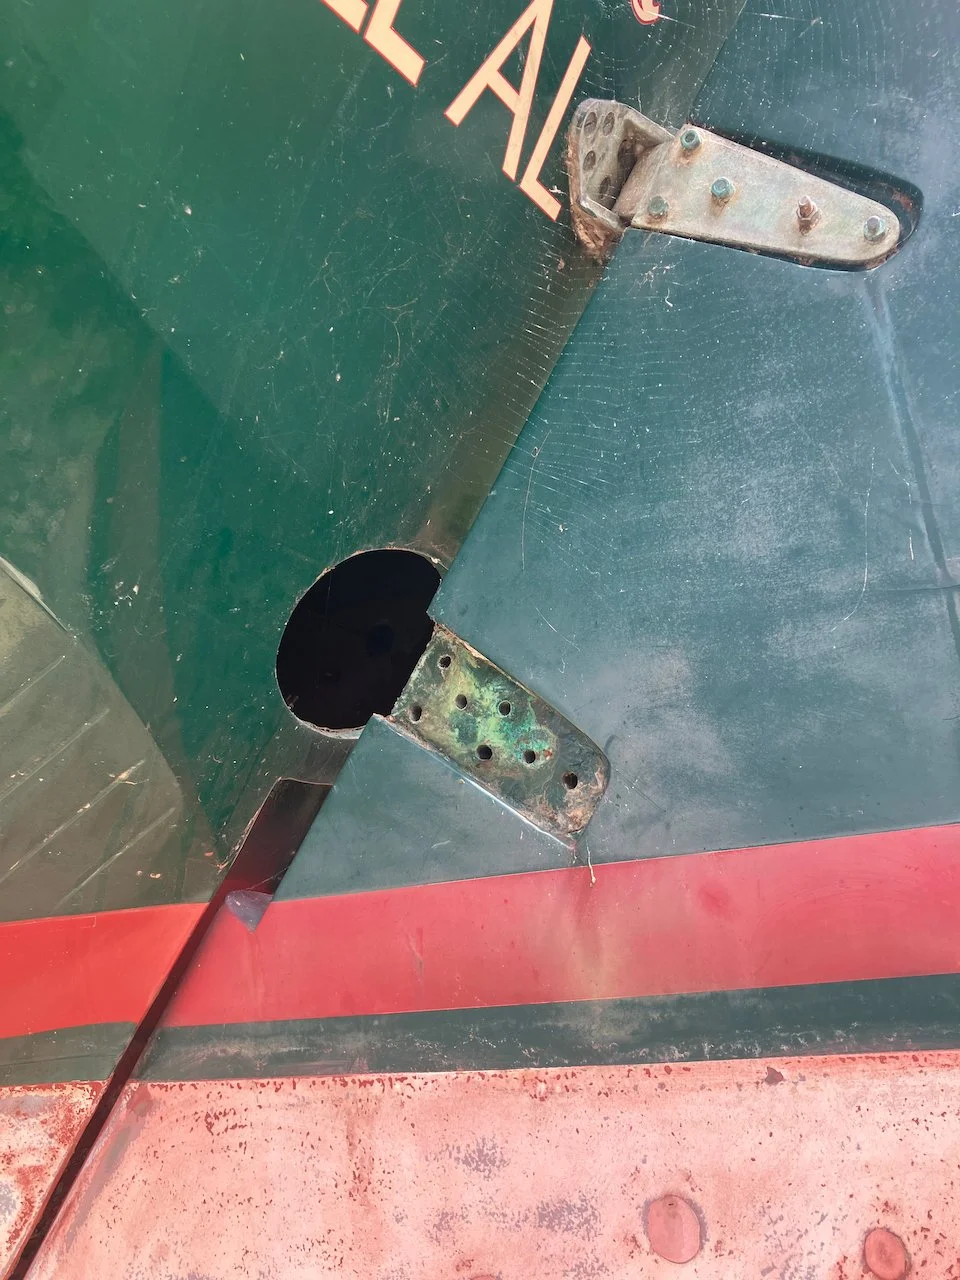
What’s worse, for us, is that because of that snug fit, cleaning the recess, let alone sanding it for painting, is shall we say problematic. And that recess most definitely needs to be cleaned. After pondering some possible work arounds, I came to the conclusion that the rudder had to come off. This would let us clean and properly apply new paint, but it would also let me check the wear pattern of the opening in the bronze shoe the lower rudder pin fits into. The E31 and her big sister, the E36C, can present their owners with a clunking sound if that opening in the shoe gets out of round from wear over time. We don’t currently have that problem, but it would be nice to know if there are early signs of it.
Removing the rudder first involved removing the steering quadrant from the rudder. The quadrant is the pivoting arm where the steering cables, connected to the wheel, are attached. Removing the quadrant required removing the eye bolts holding those steering cables from the quadrant. On the E31 this is accessed from a small hatch in the aft portion of the cockpit. Two nuts hold each eye bolt; the first acting as the adjustment nut and the second acting as a lock nut holding the first in place. Once the inside end is free from the cables, seven bronze bolts hold the quadrant arm in its molded-in mount on the rudder. These came off surprisingly easy, considering they’ve probably not been removed in many years. A few required a few taps with a hammer to break the sealant they were installed with. But out they came without much complaining. Back in the cockpit, the quadrant arm could be pulled into the boat and laid aside.
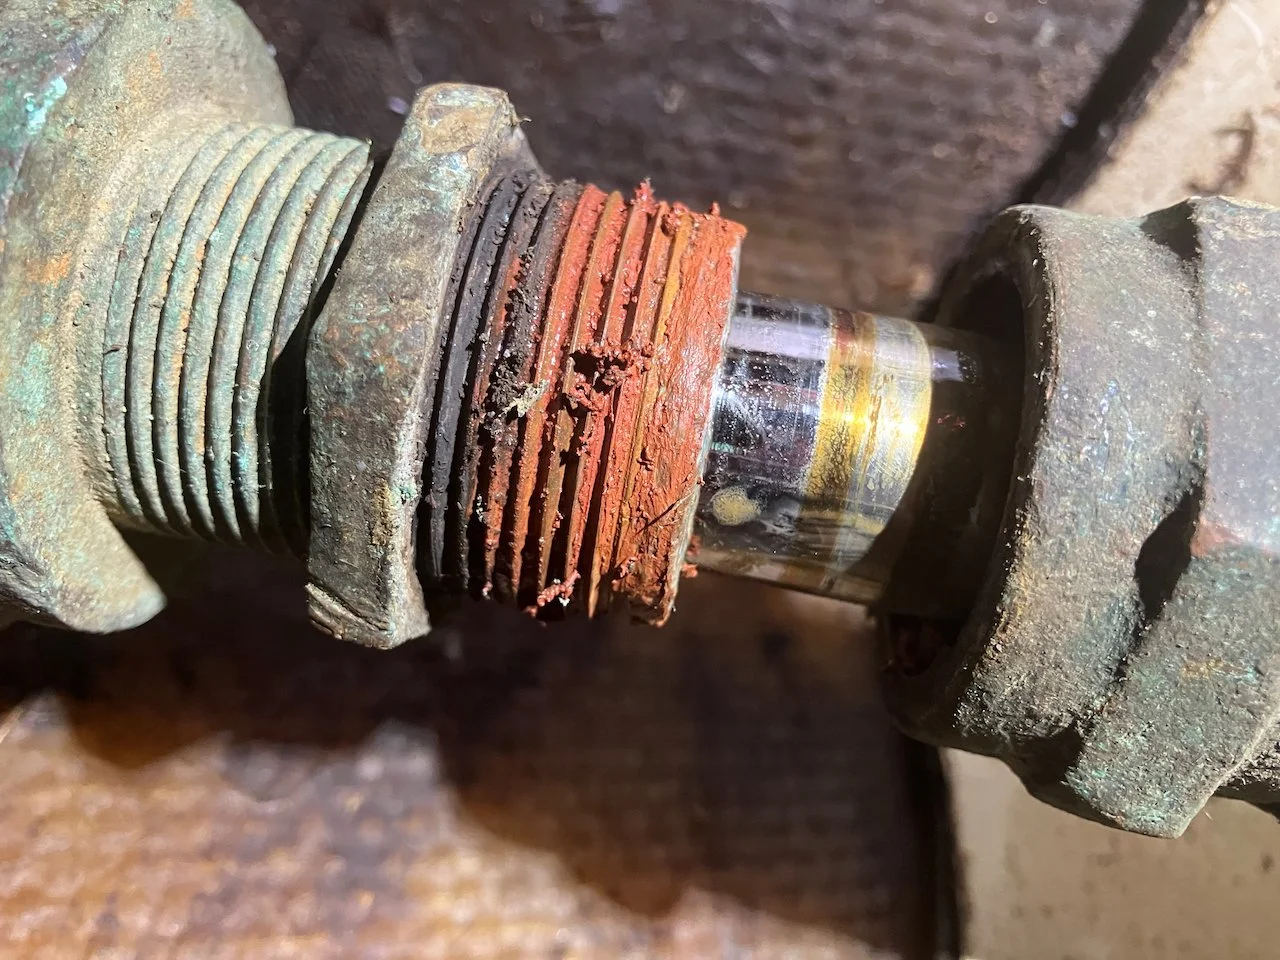
Back outside, the next step would be removing the upper pin. When I say pin, I mean a roughly 4” long bronze bolt, with a 15/16” head, secured by a similarly substantial nut and lock washer. Ericson was apparently quite proud of the hardware they used here. I remember the brochure saying “…35 lbs. of bronze hardware is used to anchor the rudder to the transom.” That pin/bolt was a bit more determined to stay where it was. And given its location, it required some ingenuity to access. Fortunately, I have a 24” socket extension and breaker bar, which gave it sufficient encouragement to begin turning. But only a little. It was getting late in the day, so I gave it a good dousing of PB Blaster Penetrant. Tomorrow I’d try again.
Tomorrow arrived and the bolt was still stuck. Thinking it might be, I had brought out the heavy equipment - an impact driver. It moved the bolt head a good three turns, and then stopped. Backed it off, more PB Blaster, and let that soak in. After repeating this about three times, shortly before lunch the nut came loose. I was surprised at how good its condition was having been in the same spot for 40+ years. Before removing the bolt, I needed to secure the top of the rudder, so that when that bolt was removed, the rudder could be slowly eased out of its upper mounting bracket.
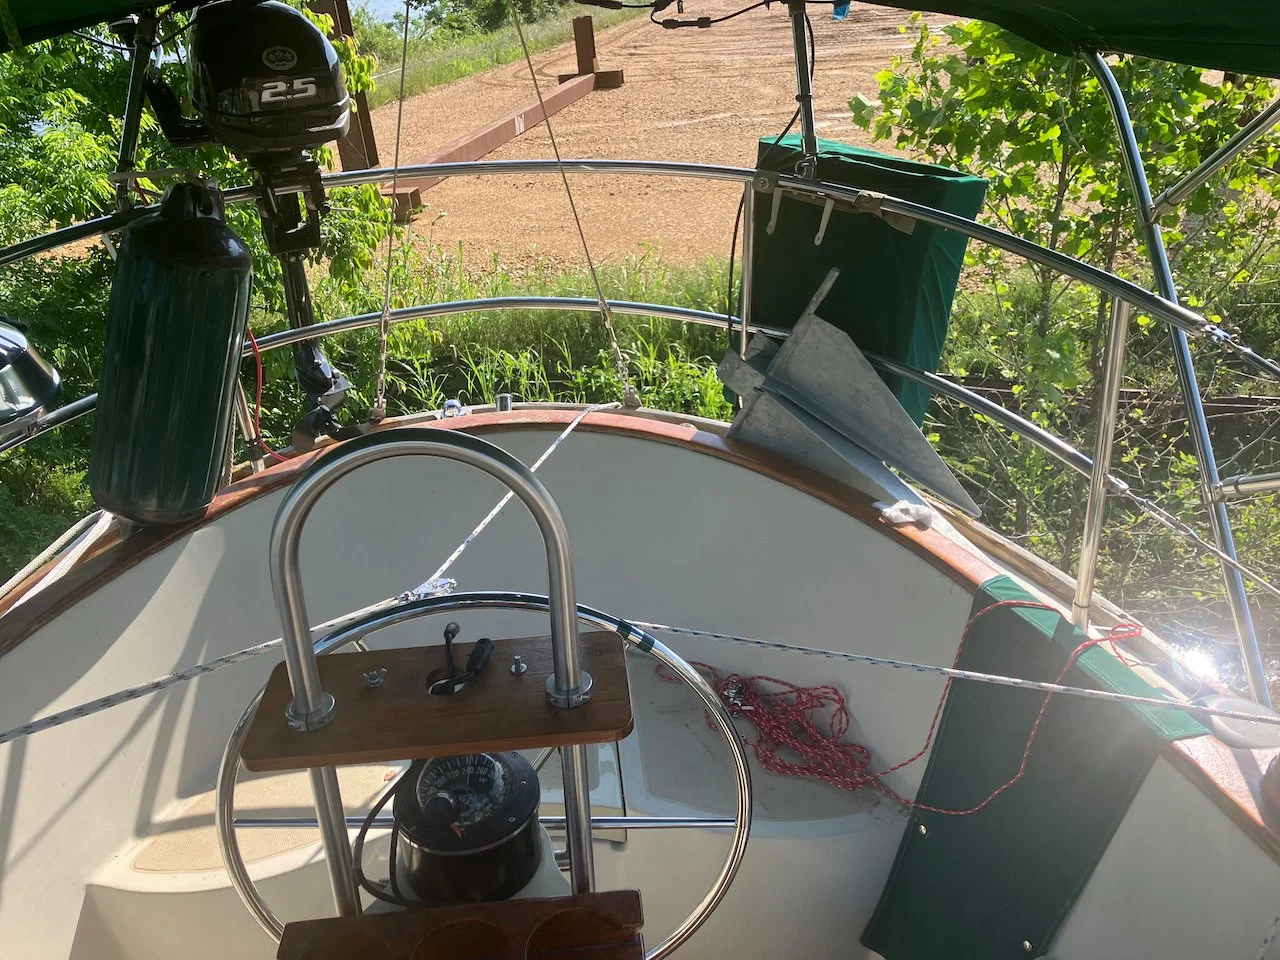
Line from rudder thru a block, to winch.
Sailboats have winches. They are there to make work easier - hmmm. Rigged a line with a block to a cleat on one side, and ran a line through that block from the port side winch to the top of the rudder and secured it there. After looking over everything carefully, I added some tension to the line to take the load off the bolt. Back down the ladder and around to the rudder, I eased the bolt out of its mount. Everything stayed where it was supposed to stay. A closer look at the bolt showed a lot of dirt and a bit of corrosion in the threads, no wonder it didn’t want to come loose.
With the bolt free, I could ease off the tension on the line and let the top of the rudder slowly drop out of the mounting bracket. Just about two inches was all that was needed; more would start to stress the pin in the bottom mount. With the rudder top free and secure, now I had to consider the next step. A couple or four extra hands would have been nice, but no one was around. Knowing that the weight and position of the rudder would cause it to swing aft, away from the transom (and maybe taking me with it), I made a plan.
Our study step stool has been quite handy have around the last couple of weeks as blisters were ground out and the cavities filled in with new glass and epoxy. It was about to be handy again, as it was just the right height to sit just an inch or two below the lowest point of the rudder. With it in place, I hugged the rudder and assumed the “use your legs to lift” position. The pin holding the rudder in place is only about 1.5 inches long so I only needed to lift it that much and then “gently” drop it on the stool. A heave and the rudder was free. I did okay in physics class, so I had an idea what to expect, but the momentum it had was still surprising. The stool caught it, and held it in place, while I grabbed a piece of plywood and positioned it on the ground, where the arc that the rudder wanted to travel met up with the pavement. Another heave and it was down, more or less, safely on the ground.
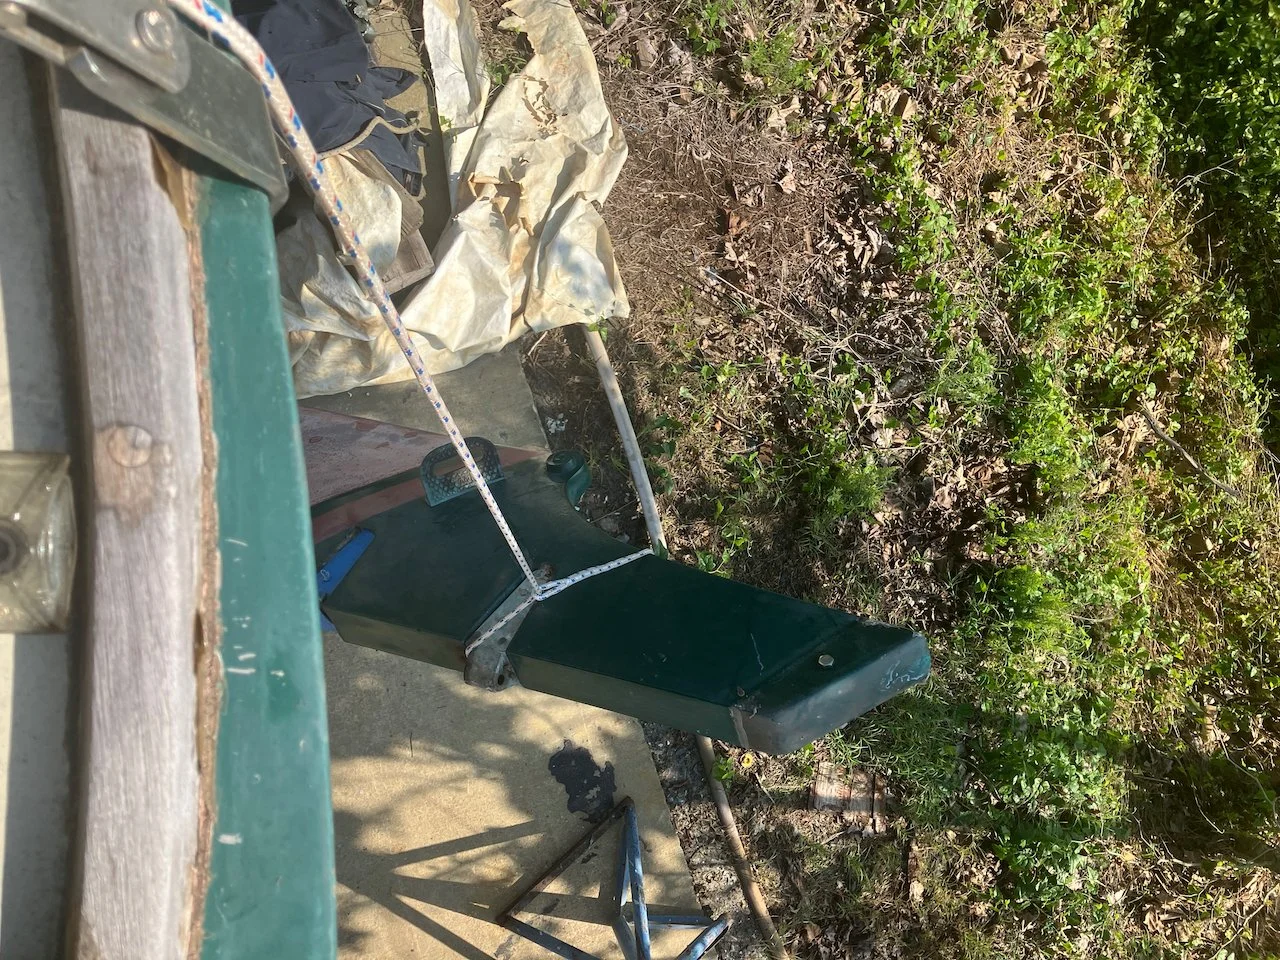
Back up to the cockpit and eased off the tension in the line just a bit, and watched as the rudder top also tried to find a path to the ground. A couple of trips back down the ladder to adjust the plywood position as the rudder wanted to twist and pivot around its center of balance when some additional line was paid out. But after a few moments it was safely on the ground. All things considered, it wasn’t as bad as I thought it would be.
With the rudder on the ground, the hole in the bronze shoe it sat in looked fine. No sign of wear or other damage. The rudder lower pin looked good as well, though there was some slight cracking near the pin where the two sides of the rudder are bonded. Not bad enough to grind out and reglass, but decided to seal it with a coat of epoxy before painting. Examining the slot in which the rudder’s leading edge sat, confirmed a theory we had - that it was quite possible the rudder had not been removed in decades. There were some hints of older marine growth, but the hit and miss placement of old paint made it obvious that former painting attempts were “do the best you can, I’m not taking the rudder off”. There were areas where the original gelcoat was still visible. Those could have easily been painted with the rudder removed.
The next couple of days were misty rain, not great for painting. So a project inside the boat. Kotona has an inboard diesel engine, with a prop shaft that passes through an opening in the hull. That opening contains a sleeve, called a cutlass bearing, that holds the shaft in proper alignment. The cutlass bearing is lubricated with water and there is a piece of hardware that keeps that water from coming into the boat, called a stuffing box. It is basically a cap that screws down on the fitting where the shaft passes through the hull. Inside that cap is a soft material that when compressed as the cap tightens, forms a seal around the prop shaft.

Over the last several months, we noticed that our stuffing box had developed a steady drip. While you are underway and the shaft is turning, it is supposed to drip just a tiny bit, to keep the shaft lubricated. Ours was dripping even when not underway. Not a lot, but enough to indicate that it might be time to change the stuff inside. We had no idea when it was last changed and the general consensus is change it every few years. Since this is best done out of the water, now was the time.
The process of changing the stuffing in the stuffing box is simple enough; loosen the lock nut, loosen the cap nut, pick out the old stuffing with a special tool, place the new stuffing in, tighten everything back. Simple.
Accessing it is the problem. The space at the aft end of the engine is tight and I just don’t fold up into small spaces like I used to. Sigh. Still it wasn't too bad, just had to stop once in a while to get my knees to stop cursing me.
Once the cap was loose and the old stuffing dug out, the new was wrapped around the shaft and compacted in by snugging up the cap nut against the end of the fitting. The stuffing is a Teflon coated tube shaped synthetic fiber. You precisely cut a length to wrap around the shaft, put it in place, press it into the cap, and repeat until the cap is full but will still thread securely onto the fitting.
After four layers were in place it was done. I hand-tightened the cap nut and lock nut and extricated myself from the cockpit hatch. We would adjust the tension so that it dripped properly while we were underway, after launching. One more thing to check off the list.
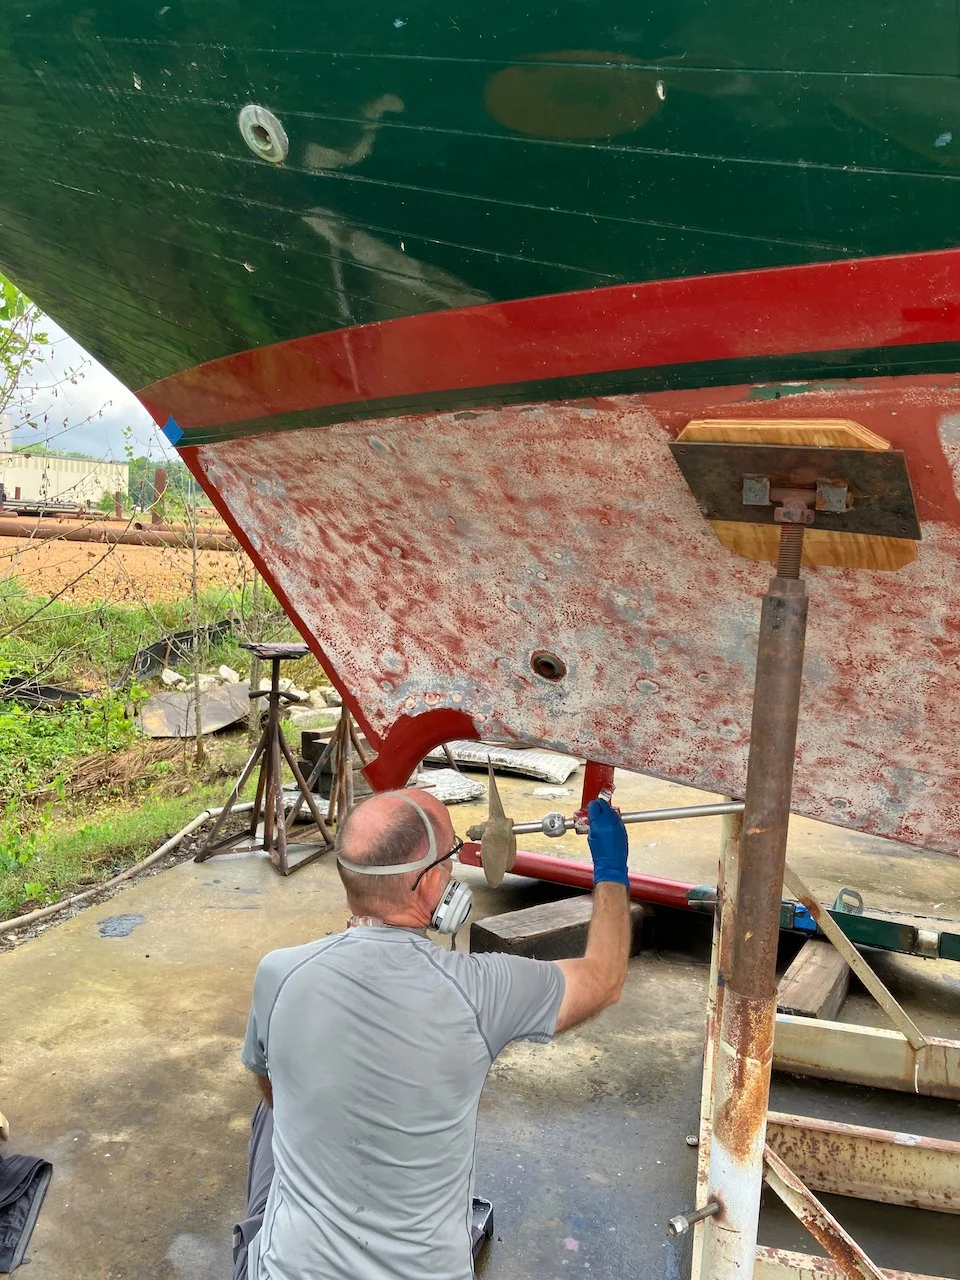
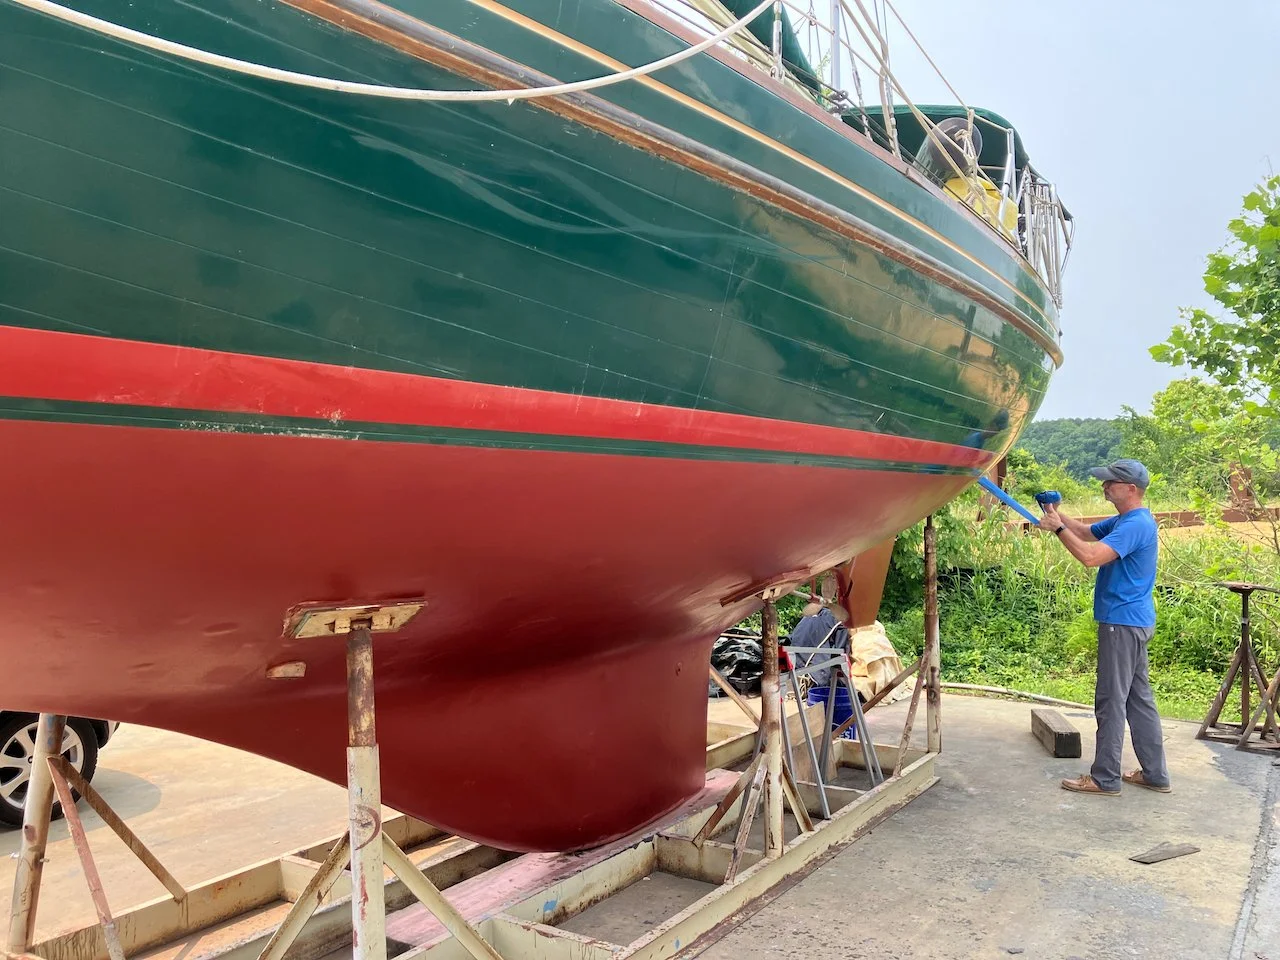
The final Saturday in the yard began early. Paint prep was all complete on Friday, so today was the big day. Bottom paint, rollers, pans, brushes, rags, gloves and clean-up solvents were all laid out for easy access.
After taping the hull at the waterline, Amy started in the rudder slot while I worked on the leading edge of the rudder. Then we began the starboard side, me using the 9” roller and Amy using the 4” to cover the curves of the hull where the 9” wouldn’t fit.
We worked our way around the boat periodically mixing paint and refilling pans, until we got back to where we started. A short break for water, rigging the lifting line for reinstalling the rudder, which went amazingly smoothly with some help from one of the yard guys, and then it was ready for the second coat.
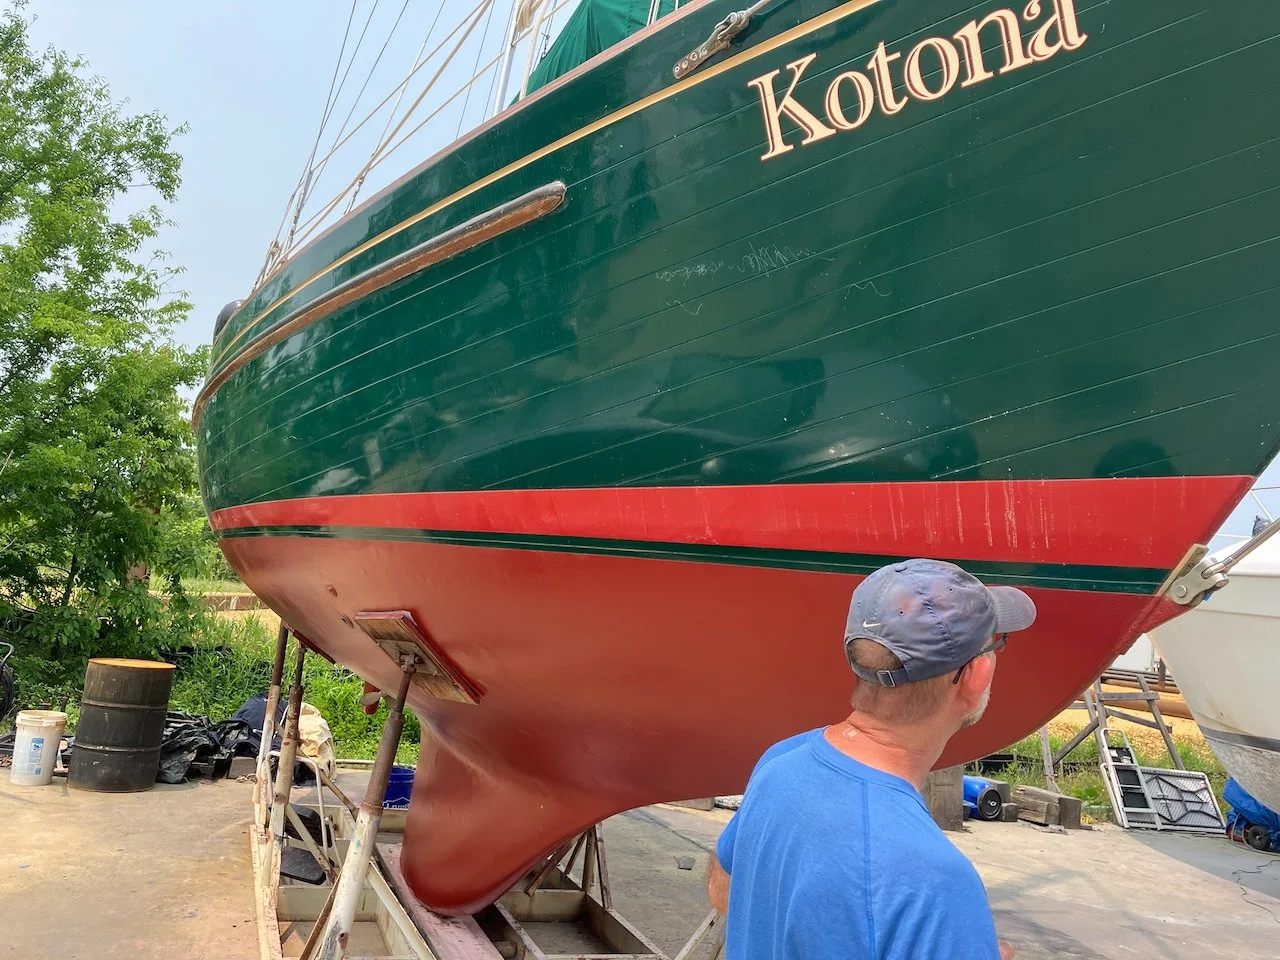
The yard owner inspecting our work. I think he approved.
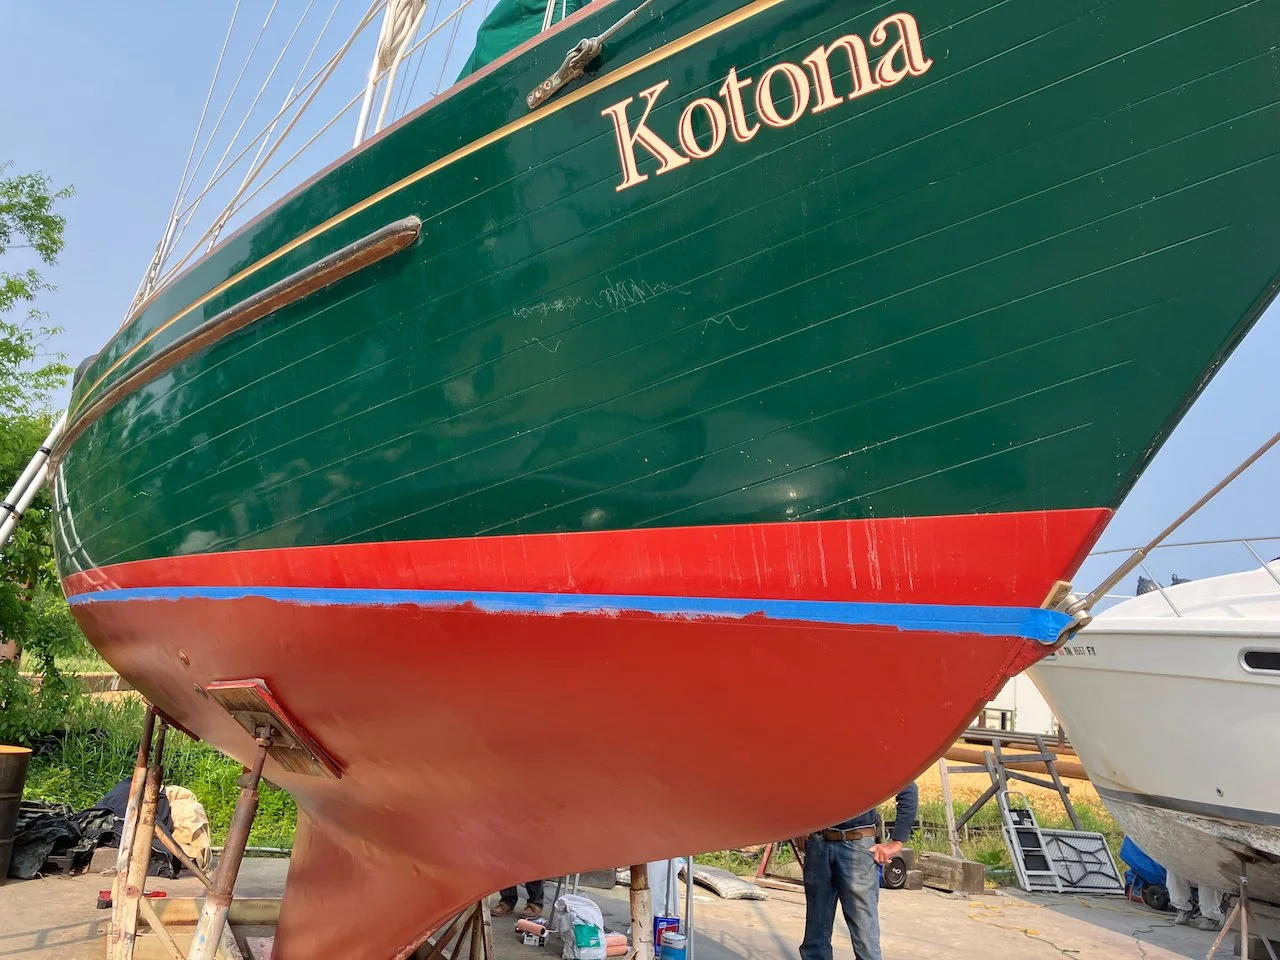
The second coat seemed to go faster than the first. With both sides done, we took a break to let the second coat dry enough to pull the tape. And then, we stood back and admired the view. The red antifouling isn’t an exact match to the red of the water line but it was close enough. Knowing we won’t have to do this again for a couple of years was just icing on the cake. We also looked forward to the extra half a knot or more that a cleaner, smoother hull should give us.
All that remained was for the yard to lift the boat in the slings, so that the areas covered by the cradle supports and the bottom of the keel could be painted. We packed up our supplies, talked to the yard owner about scheduling the final lift, and headed back to the house. It was just barely lunchtime, so we had a celebratory lunch at a nearby local BBQ place we had been to a few times when we were at Grand Harbor Marina. Great sandwiches. And a great sense of relief. The final lift would be Tuesday, the last of the paint applied that afternoon would have plenty of time to dry overnight. Launch would be Wednesday morning. And our first real haul out would be done.